
Linux installation
If you dont already have Linux, please install it on your laptop and get used to it before the
lectures start.
You can install any version of Linux. The instructions below are for Ubuntu.
For this course Ubuntu 20.04 LTS is recommended and this is what you should preferably install.
Ubuntu Mate, Linux Mint, Fedora Linux, Scientific Linux etc. would also be fine.
Note:
For several Linux distributions, pre-compiled binary images of ROOT are available.
(See List).
It is better to use one of these to avoid complications in the installation of ROOT.
Dual-Boot Ubuntu with Windows
1. Create a Linux Partition
Boot your computer in Windows. Right click the Windows icon on the task bar and select Disk Management or in Control Panel search for Disk Management and select Create and format hard disk partitions.
The aim is to shrink one of the Windows volumes and make space for Linux.

In the example above the computer has a single hard disk and only one volume (C: drive). If there is a second
volume (D: drive), one could also shrink the D: drive. Before proceeding make, sure you understand what you
are doing. A small mistake could wipe out your Windows installation or render it unbootable.
We are concerned with the C: drive. Do NOT make changes to the EFI System and Recovery partitions.

Right click the C: volume and select Shrink Volume.

First we have to set the amount of space to shrink (which is going to be the amount of space for Linux).
It will intially be showing the maximum possible value. We should select a value smaller than that.
In the above example the size of C: is presently 487,516 MB which corresponds to 476 GB (1 GB = 1024 MB).
We need at least 10GB (10,240 MB) for comfortably working with Linux.

Here I have set the shrink space to 102,400 MB. This will give me 100 GB for Linux.

This is the picture after clicking Shrink. The C: drive has gone from 476.09 GB to 376.09 GB and an
Unallocated space of 100.00 GB has been created. Close Disk Mangement (File > Exit).
Immediately reboot Windows and allow the disk to be checked for errors. This will finalise the new partitions.
2. Download Ubuntu 20.04 LTS
Download Ubuntu ubuntu-20.04.3-desktop-amd64.iso from this link.
4. Download and run Rufus
Rufus is used to create a bootable pen-drive. Download rufus-3.17.exe from
this link. Insert a pen-drive of capacity at least 3 GB in a USB port of your PC.
The pen-drive will get completely erased, so make sure you do not have any useful data in it.
Double click the downloaded file rufus-3.17.exe and click Yes.

Click on SELECT (not the down-arrow next to it) and pickup the downloaded file Ubuntu ubuntu-20.04.3-desktop-amd64.iso. Your screen will change:

Without changing any other settings, click START, then select Write in ISO Image mode and OK.
On the next screen:
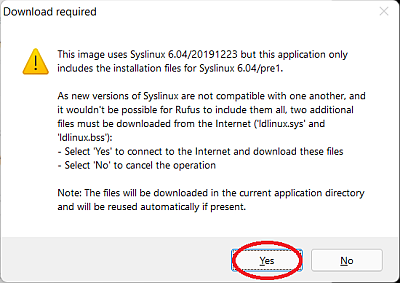
Click Yes. The process will start. If it appears stuck, be patient and let it continue. It will take at least 10 min. When the Status shows READY click CLOSE. Your bootable pen-drive is ready.
5. Boot Linux from the pen-drive
Newer computers are equipped with UEFI secure boot. This is not a problem if you are installing a new version of Ubuntu such as 20.04. On older computers you will need to enter the BIOS settings and change the boot order so that you can boot from the pen-drive. On newer computers, inset the pen-drive in a USB port, power on the PC and click F12 key several times before the system boots. This will take you to the one-time boot menu of BIOS. Here you will see your pen drive listed among the different boot options. Select that and press enter to boot from the pen-drive. The process of booting from a pen-drive varies somewhat depending on the computer. The above procedure is for a DELL Inspiron. On HP Envy laptops press esc several times during boot followed by F9 (Boot Device Options). If in doubt search Google with e.g.: How to Boot Lenovo from USB or How reach BIOS for Lenovo
When you boot from the pen-drive you will see a boot menu with the following options:
Ubuntu (safe graphics)
OEM install (for manufacturers)
Boot from next volume
UEFI Frmware Settings
Press enter or wait 5 sec to boot Ubuntu.
5. Install Ubuntu
After booting Ubuntu from pen-drive you will see:

Select Install Ubuntu. Select English (US) as the Keyboard layout. On the next screen you get the opportunity
to optionally connect WiFi during installation. After that you should opt for Normal installation (not
Minimal installation) and if you connected WiFi then you can select Download updates while installing Ubuntu. The option Install third-party software for graphics and WiFi hardware and additional media formats is normally not required. Pay attention on the next screen and select Install Ubuntu alongside Windows Boot Manager. Do NOT select Erase disk and install Ubuntu as this will completely remove your Windows installation! Also do not select Something else because we have already resized partitions as per our requirement. At this point you will recieve a final warning from the installer indicating that changes to the disks are going to be made.
On the next screen:

enter a user name and password. Ubuntu will create a login with this user name and the same password will be used for super-user (administrative) commands.
After this installation starts

At the end you will see the following:

Without removing the pen-drive, click Restart now. The installer will then ask you to remove the pen-drive. The bootup screen will now look like this:
Advanced options for Ubuntu
Windows Boot Manager (on /dev/nvme0n1p1)
UEFI Frmware Settings
Use the up and down keys to select either Ubuntu or Windows. If you wait 3 secs the system will automatically boot Ubuntu.
6. Post installation
Login with the password you had set. You can skip connecting online accounts, but go ahead with system update. Your Ubuntu installation is complete.